Sorting and filtering data are essential skills for working with large datasets in Confluence. With the vast amount on your Confluence page, advanced sorting and filtering techniques can save a significant amount of time and effort. In this post, we’ll explore some techniques for sorting, filtering, and sharing tables in Confluence to you manage your data efficiently.
Sorting Data
The first step to sorting your data with Excellentable is to create a new excellentable and publish it on your page. Once done, you can apply the filters in Excellentable.
Ascending order is the default sorting method. It sorts data in ascending order, which means the data is arranged from smallest to largest (A to Z or 0 to 9). Descending order is the opposite of ascending order. It sorts data in descending order, which means the data is arranged from largest to smallest.
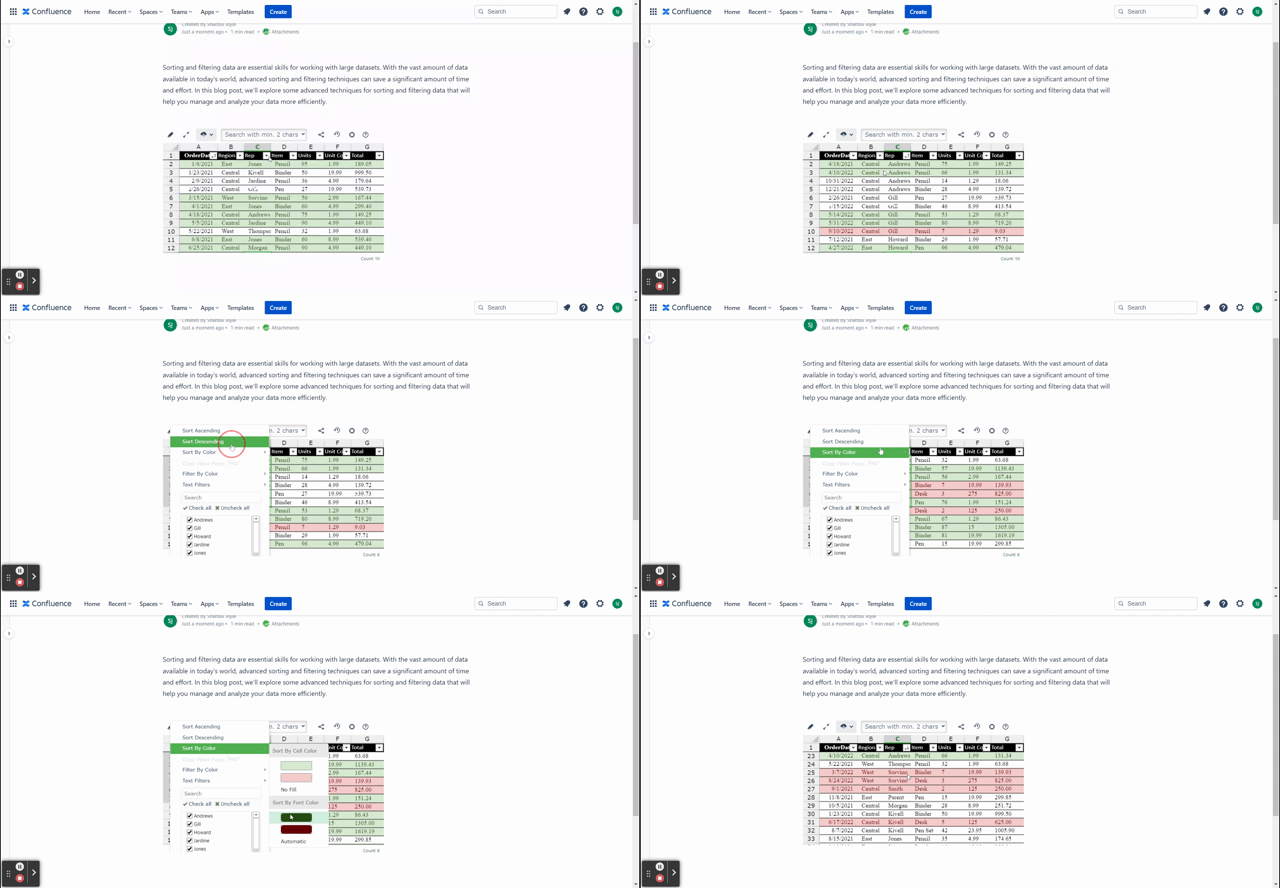
To sort data, click on the column header you want to sort by. For example, if you want to sort a list of names in ascending/descending order, and select the required option. The data will be arranged in alphabetical order, from A to Z or Z to A.
You can also Sort the table by color. Please note Sorting by color just keeps the required color on the top while keeping the rest of the colors sorted as is.

Filtering Data
Filtering data is the process of selecting specific data based on certain criteria. You can filter data based on one or more criteria, such as date range, specific values, or text strings. There are several advanced filtering techniques you can use to filter data more effectively.
Confluence Filters
Excellentable filters allow you to create your own filter criteria. To create a filter, click on the column header you want to filter by and select “Filter” from the drop-down menu. From there, you can select the values you want to filter out/keep.

Advanced Filters
Advanced filters allow you to filter data based on more complex criteria. You can use advanced filters to filter data based on multiple criteria, such as date range, specific values, or text strings. To create a custom filter, click on the column header you want to filter and select “Filter” from the menu. From there, you can select the criteria you want to filter by, such as “contains,” “starts with,” or “ends with.” You can also specify the value you want to filter by, such as specific values, date range, top ‘X’ values, or text string.

Searching Data
To search data in Confluence View mode, start typing the content at the top of your Excellentable view mode. Please note that right now the search functionality searches the string inside all the cells, and hides out the rows that do not have the required data.
Sharing your Filters/Searches
Confluence is a collaborative tool, so you need to be able to share your work with your team. However, the view mode changes are not permanent, you can share your views and searches with your teammates. Select the user you want to share your search with and create a filter and click Share.

Conclusion
Sorting and filtering data are essential skills for managing and analyzing large datasets. Advanced sorting and filtering techniques can save you a significant amount of time and effort. By using advanced filters, you can filter data based on more complex criteria, such as date ranges and text strings. By using sorting methods, you can sort data based on specific criteria, such as alphabetical or numerical order. With these advanced techniques, you can manage and analyze your data more efficiently.
Learn more about Spreadsheets in Confluence and start your 30-day free Excellentable trial today


